

Each new quarter requires a lot of organization. You have to register for the right classes, buy the right textbooks, attend classes on the right day and time and be sure to get homework in by the right due date. Keeping on top of all of this can be hard — but here are some tips to help you stay organized with your online classes and make things as easy on yourself as possible!
1. Update your Canvas notification settings.
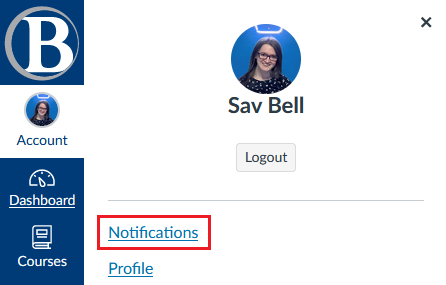
Accessing notification settings on Canvas for the web.
In order to stay up-to-date on your online courses, I would recommend adjusting your notification settings to make sure you’re alerted about all class activities. Canvas offers two types of notifications: email messages and push notifications for mobile devices. On the Notifications setting page, accessed through the Account button on the left-hand sidebar as pictured above, you can turn on or off and adjust the frequency of notifications for a variety of course activities. Frequency options, pictured below, include instant notifications and daily or weekly summaries for email notifications, while mobile push notifications can only be immediate or completely turned off. Some course activities are unavailable for mobile push notifications.
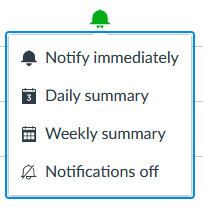
Frequency settings for email notifications.
The adjustments you make to your notifications depend on what works for your own lifestyle — if you’re a commuter, maybe you will want mobile notifications to keep informed on the go, or if you always have Outlook running on your computer, maybe email notifications would work best for you. A big tip I would suggest is to pay attention to what you need for each activity type. Personally, I prefer to hear about my grades as soon as possible, so I have those on instant notifications. The same goes for submission comments, announcements, conversations (your Canvas “Inbox”), and discussion mentions. For other activities, such as changes to course content (e.g. a new unlocked module), invitations (e.g. peer reviews opening), and assignment due date changes, I prefer a daily or weekly summary. Try a combination out and make changes as you see fit until you find your perfect balance! Pro tip: you can hover over a course activity for a description of what it means, such as the example pictured below.
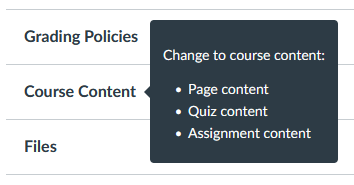
Canvas description for course content notifications.
2. Change Canvas course names and colors.
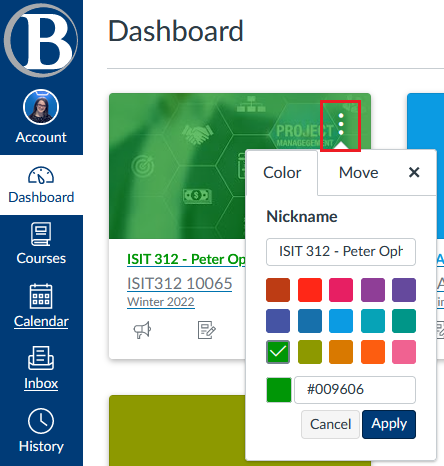
Changing the options for a class on Canvas’ Dashboard.
Do you remember in elementary and high school when you color-coded your binders based on what you felt the appropriate color for a subject was? You can do the same thing on Canvas! I always recommend changing the color and nickname for a class to make it more recognizable and feel right on your Canvas homepage. To do this, click the three dots on the top-right corner of the card for each of your courses on the Dashboard view, as pictured above. You can choose from a selection of default colors or enter your own hex code for a custom color. I also always give my classes a nickname of the course code and the instructor’s name (“ISIT 312 – Peter Ophoven” above), which makes it really easy to find and reference when I need to send a Canvas message to a professor, as shown below. It also affects the Canvas calendar colors, which we will get to next!
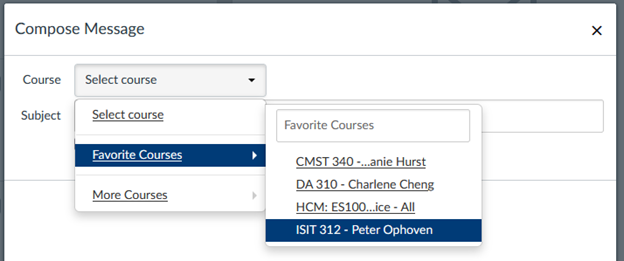
New Canvas message with course nicknames applied.
3. Use Canvas’ agenda view.
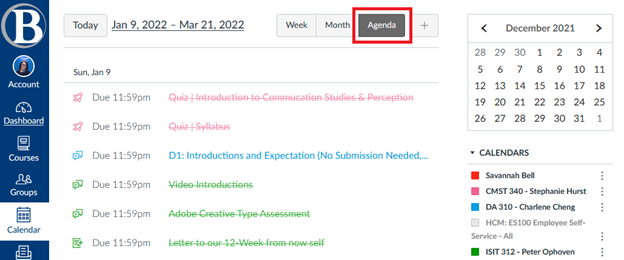
Agenda view on the Canvas calendar page.
One of the best features of Canvas, in my opinion, is the Agenda view on the calendar (or the To-Do view on the Canvas mobile app). There, you can see a list of all your upcoming assignments sorted by due date and marked with the color you chose for each class on the Dashboard. You can pick and choose which classes are displayed by clicking the square beside their name under “Calendars” on the bottom right. I find this much easier to navigate than the weekly view, because I can see exactly what’s coming up so I can better prioritize my work. Plus, it’s really satisfying to see everything crossed off once it’s been submitted!
5. Import your Canvas calendar to Google Calendar or Microsoft Outlook.
If you use Google or Microsoft calendar apps to keep track of work or personal events, you’ll likely benefit from having your homework schedule on there, too. I’ve always found it frustrating to type all my homework assignment names, classes, and due dates on my digital calendar, but luckily Canvas has a nifty tool that will allow you to “subscribe” to your Canvas calendar in any email app! It will import all of the information for you and update itself automatically if any of your coursework changes. And the best part — once you import it once, it’s there until you delete it, which means you will have it for all future quarters as well! Here are the steps for either Google Calendar, Microsoft Outlook for the web, and Microsoft Outlook’s desktop app:
1. Copy the URL for your calendar feed by clicking the link on the right-hand panel on Canvas’ Calendar view.
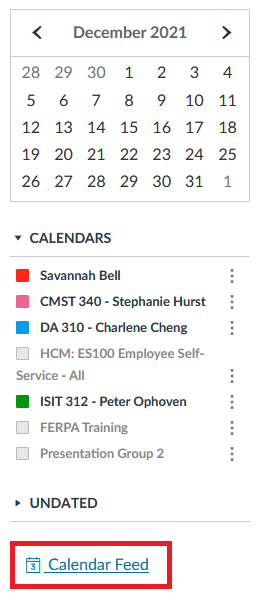
The link to your Canvas calendar feed URL.
Option 1: Google Calendar
2. On the main Google Calendar page, click the plus button next to “Other calendars” and choose “Subscribe to calendar.”
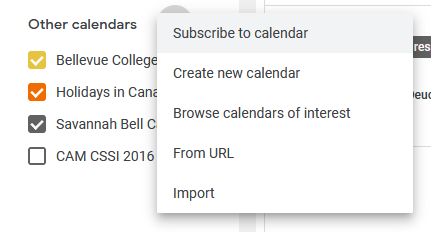
The “subscribe to calendar” button on Google Calendar.
3. Click the “From URL” option on the left-hand navigation bar and paste the Canvas calendar URL you copied in the first step.
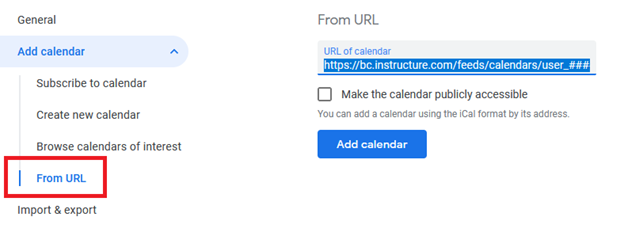
Adding the Canvas calendar URL to the Google Calendar page.
4. You’re done! Your calendar should appear on your main Google Calendar homepage. You can edit the name and color by clicking the three dots next to the calendar’s name under the “Other calendars” section mentioned above.
Option 2: Microsoft Outlook for the Web
2. On Outlook’s calendar webpage, click the “Add calendar” link on the left-hand navigation. You may need to click the hamburger icon beside the “New event” button on the top-left of your calendar to make the option appear.
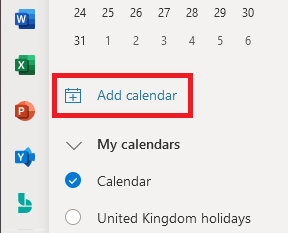
The “Add calendar” link on Microsoft Outlook for the web.
3. Choose “Subscribe from the web” on the left-hand side and enter in the Canvas calendar URL from the first step. You will then have the option to change the calendar’s name, color, and icon before you import it. Then you’re done!
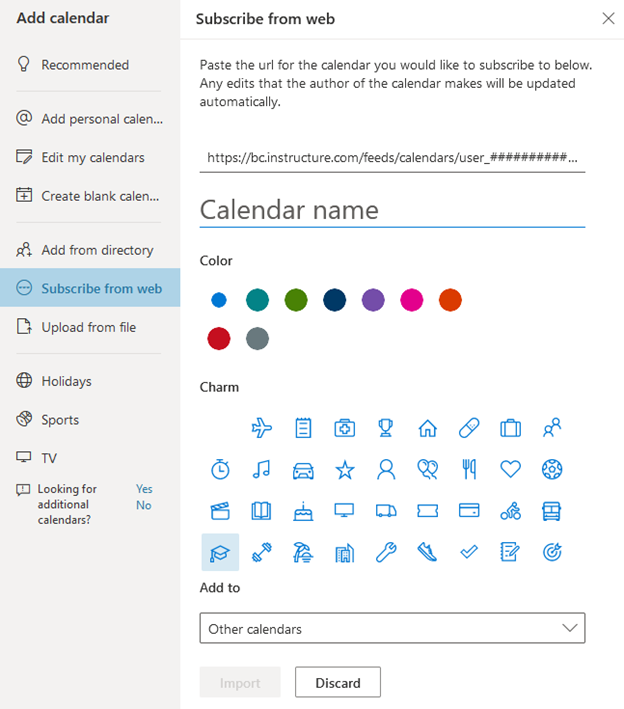
Outlook for the web’s “Add calendar” page.
Option 3: Microsoft Outlook’s Desktop App
2. On Microsoft Outlook’s desktop app Calendar view, right-click “My Calendars” on the left-hand side and choose “Add Calendar” and then “From Internet…” on the menu that pops up.

Adding a calendar from the internet on Microsoft Outlook’s desktop app.
3. Paste the Canvas calendar URL from the first step in the dialog box that pops up. Click “Yes” to confirm you want to import it and you’re done! You can change the calendar’s color and name by right-clicking it from under the “My Calendars” list shown above.
Now that you have your Canvas notifications, class names and colors, agenda view, and calendar all set up, you’ll be able to keep on top of your classes and stay organized all quarter long!


